
Vitrectomy Basics
Before the Case
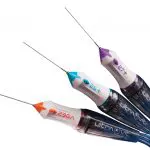
Which Gauge?
Depends on the pathology, surgeon preference, and instrumentation. Postoperative inflammation and comfort improve with smaller gauges, as do the opportunities for self-sealing wounds. Smaller gauge and the shorter distance from instrument tip to the port may enable cutter-enabled membrane segmentation and delamination. However, some instrumentation may not be available in smaller gauges, the smallest gauge systems may be too flexible for certain cases, and vitrectomy may be slower with smaller gauges.
20-G – Rarely used now, but may be useful if planning on opening up conjunctiva and extending a sclerotomy, such as for large intraocular foreign bodies. There are instruments that are only available in 20-G, such as the fragmatome and IOFB forceps. The wounds must be sutured.
23-G – Became the gauge of choice after the initial 25-G instruments were found to be too flexible. This is still the go-to gauge for many surgeons and is still less flexible compared to the new 25-G systems.
25-G – The go-to gauge for many surgeons and increasing in popularity. The instrumentation options are similar to 23-G expect for a few options. The wounds are usually self-sealing.
27-G – The newest and smallest gauge that creates the best self-sealing wounds and post-op comfort. The vitreous cutter can function more as a multi-purpose instrument, as it can enter smaller surgical planes. However, the instrumentations may bend if not used carefully, and vitreous removal is less efficient.
-

- Alcon cutters
-
- B&L cutters
-
- DORC cutters
What’s in the Bottle?

Adopted from www.myalcon.com/products/surgical/bss-plus/bss-sterile-irrigating-solution.shtml
BSS PLUS – Addition of bicarbonate (buffer), glucose, and glutathione (antioxidant) to the standard BSS solution to reduce corneal and lens decompensation intraoperatively and postoperatively.
Dextrose – Many surgeons prefer to add dextrose into the bottle for phakic patients with diabetes to prevent intraoperative and postoperative crystalline lens opacification. 3 mL of 50% dextrose is added to the BSS bottle.
Epinephrine – Some surgeons prefer to add epinephrine (preservative free 0.3 mL of 1:1000 epinephrine) into the bottle to maintain dilation and hemostasis. It’s particularly useful for eyes with poor dilation if mechanical dilation is not being considered and for intraocular lens fixation cases when there will be iris touch. Some surgeons feel that they would rather see all bleeding and apply hemostasis with laser or diathermy, as compared to artificially controlling it during it the surgery and seeing hemorrhage postoperatively.
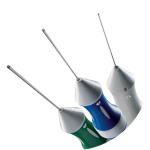
Which Viewing System?
Vitreoretinal surgical viewing systems are used in conjunction with the operating microscope. Most vitrectomy requires wide angle viewing systems that provide approximately 130° of view. The viewing systems are largely divided into non-contact systems, or contact lenses. The contact lenses can be hand-held by an assistant or sutured on.
Macular surgery is usually performed using a macular lens, most of which are contact lenses.
The following are the most widely used systems in the United States, but there are many other options in the market.
Non-Contact Wide Angle
More surgeons in the United States are now using non-contact viewing systems to be independent of an assistant. There are two lenses within these systems: the condensing lens is larger, fixed, and located higher in the apparatus, and the objective lens is the smaller lens that is closer to the cornea. A viscoelastic is used on the cornea to maintain the view.
RESIGHT 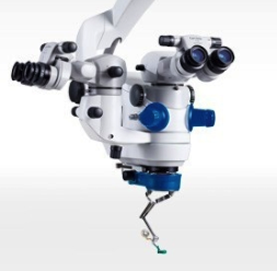
ZEISS
Used with Zeiss microscopes. The RESIGHT 700 has an internal focusing mechanism with the microscope’s foot pedal that allows focusing without movement of the objective lens, and an automatic inverting mechanism when the lens is positioned. There is a non-contact macular lens (green rim) attachment also.

BIOM
Oculus
Usually used with Leica scopes, but there is an adaptor to use on Zeiss scopes also, and a new disposable BIOM lens that can fit onto the RESIGHT if you have a Zeiss scope. The BIOM 5 is the latest rendition, where they have strengthened the lens hinge and increased the field of view. Reusable or disposable options are available. Focusing is accomplished by turning a knob (either manually or a foot pedal) that moves the BIOM lens up and down. Endoillumination on the optic disc provides a good target for focusing. After the focus is set, you move the entire microscope to the appropriate distance from the cornea to maximize the field of view. The range of focus is wide for the BIOM lens, so re-focusing is often not required.
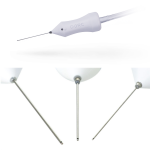
Hand-Held (Contact) Wide Angle
AVI
Advanced Visual Instruments
The introduction of the AVI lens ushered in the era of wide-angle viewing during vitrectomy. It is coupled to the cornea with a viscoelastic, and hand held by an assistant. Peripheral views are accomplished by movement of the lens, not the eye, which needs to remain in primary position throughout the case. It has the widest field of view.
Macular Lenses
Macular lenses provide smaller fields of view but with greater resolution that facilitates microsurgical maneuvers in the posterior pole, such as for ILM and ERM peeling. Most lenses are contact lenses that either use a coupling agent (many lenses available by numerous vendors) or a hand-held irrigating system (such as the Charles or Machemer lenses). Newer non-hand-held contact lenses have skirts around the lens of various material to help stabilize the lens.
Macular Lens
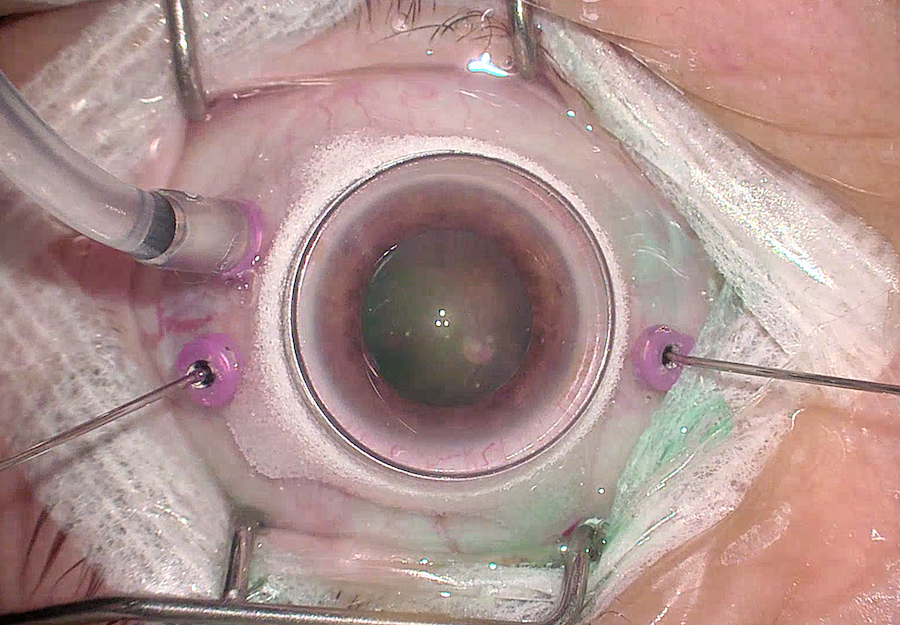
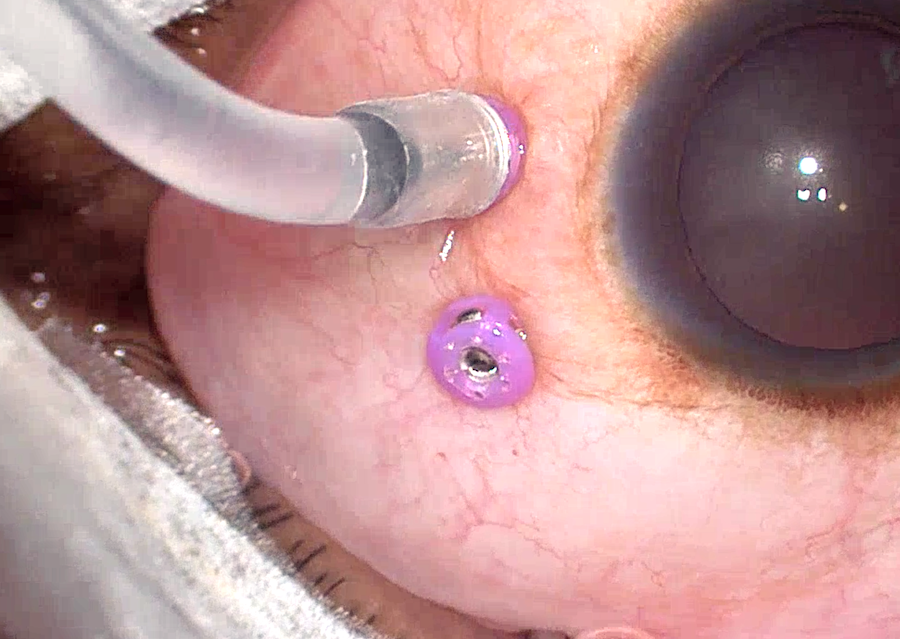
Valved or Non-valved Cannulas?
Valved cannulas are now usually preferred compared to non-valved cannulas, as they allow more stable IOP and fluid control, less turbulence (e.g. with PFO in the eye), and less likelihood for tissue incarceration. The biggest downside of valves is that soft tip cannulas have a relatively hard time entering through, and the slightly higher cost. If non-valved systems are used, plugs are used in between maneuvers.
Non-valved cannula with BSS coming out
Non-valved cannula with plug
Valved cannula
Starting a Case
Trocar Insertion
There are many ways to insert trocar-cannula systems. In 20-G surgery the incisions are made with MVR blades parallel to the limbus. However in small gauge (23, 25, 27g) surgery, the trocar incisions are made radial to the limbus. To clarify, “trocar” is the sharp instrument, and the “cannula” is what is around it and is embedded in the sclera to facilitate instrument passage.
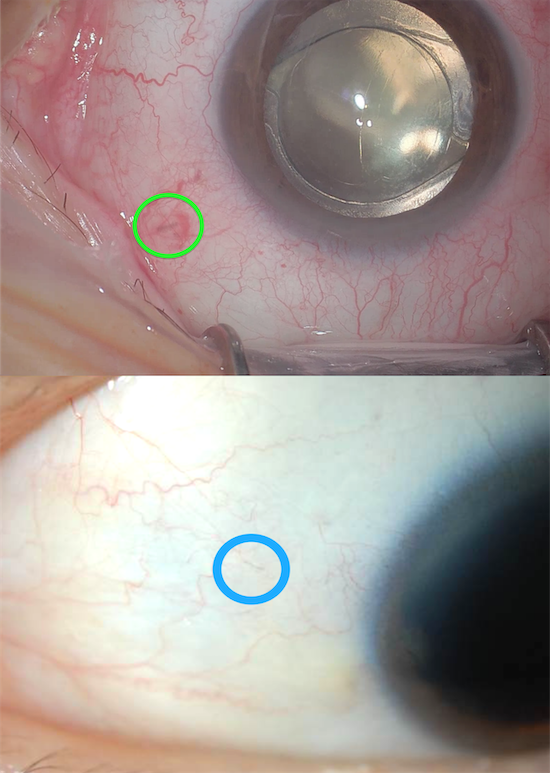
Radial 23-27g incision
Parallel 20g incision
Every surgeon has their own favorite trocar insertion technique. If conjunctiva is open for a buckle-vit or focal peritomies are created ahead of time, the technique is not as critical, since the sclerotomy will need to be sutured. However, surgeons become more particular when it comes to transconjunctival trocar insertion, because we want the highest likelihood for a sutureless case if appropriate (e.g. if the wound is leaking, it should be sutured; and if you are using silicone oil, it should be sutured). Beveled incisions are the way to go — but remember that everyone also has their own definition of “beveled.”
Trocar insertion: staying flat
Video by Tarek Hassan, MD; Edward Wood, MD; Irina De La Huerta, MD, PhD
Trocar insertion: staying flat then dunking it in
Video by Yoshihiro Yonekawa, MD
Trocar insertion: flat initially then purposely re-direct to center of the eye
Video by Mrinali Gupta, MD
Trocar insertion: non-bevelled entry
Video by Mrinali Gupta, MD
What do you do when it’s difficult to penetrate the sclera? It is usually due to a soft eye (low IOP or post-vitrectomy) or tough sclera (common in younger patients)
If the IOP is low due to a chronic detachment or ciliary shut down, you can either 1) make sure you have counter traction by holding tissue securely with toothed forceps, 2) apply pressure on the eye with a blunt instrument or cotton tip applicator, or 3) inject BSS into the eye to increase the pressure. After the infusion is in, the pressure can be transiently elevated when inserting the other trocars. Be particularly careful in retained lens fragment cases, as the clear corneal incisions may open, especially if there is no suture in place.
If the eye is post-vitrectomy, the intraocular fluid will go up the infusion line as you apply pressure on the globe during trocar insertion. You can 1) pinch the infusion line with forceps as you insert the trocars and/or 2) increase the IOP transiently after the infusion line is in.
Holding the infusion with forcep when inserting trocars
For tough sclera, which is commonly seen in children, patience is key. Rather than jamming the trocar in and pushing the globe into the orbit and risk hitting the lens or retina, use a twisting motion with minimal pressure on the eye, and you will see that the trocar will make its way in gradually. This technique is also very useful for soft eyes.
Trocar insertion with tough sclera (e.g. pediatric)
Video by Yoshihiro Yonekawa, MD
Core Vitrectomy
The core vitrectomy is usually the first step of the surgery and serves to debulk the central gel. It is important to keep the eye well centered and to use the light pipe well to light the vitreous. The vitreous cutter should always be cutting vitreous, not BSS. Staying at the edge of the cut vitreous is a good rule of thumb, especially for 25-G and 27-G, where you have to go where the vitreous is.
Core PPV
Video by Tarek Hassan, MD; Edward Wood, MD; Irina De La Huerta, MD, PhD
PVD Induction
Elevation of the posterior hyaloid is one of the most important steps for the vast majority of vitrectomy cases. PVD induction is almost always accomplished with the vitreous cutter alone. Most surgeons start with placing the cutter over the disc on aspiration. There are many techniques for the steps that follow:
- You can stay in the center of the disc, aspirate, make sure enough gel is occluding the mouth, and then pull straight up.
- Usually you need a little more than that though, because the peripapillary vitreous is very adherent to the disc and the Weiss ring needs to be nudged off. Many surgeons move the cutter to the edge of the disc, and either pull up or “drag” the cutter radially in the direction that the mouth is facing and then pull up after 1-3 disc diameters.
- This can be repeated in all quadrants
- The gel in the mouth of the cutter should be released after pulling up and before going back down to the disc, so that you are not dragging vitreous across the eye. This is accomplished by a quick step on the pedal with the cutter on.
- The PVD is extended to the periphery after the peripapillary adhesion is released, but do not extend it too fast, as iatrogenic retinal breaks can be made.
PVD induction with cutter and triessence assistance
Video by Emmanuel Chang, MD PhD and Mrinali Gupta, MD
PVD induction with cutter and peeling flatly
Video by Emmanuel Chang, MD PhD and Mrinali Gupta, MD
PVD induction can be challenging. What do you do if the usual methods don’t work?
- Try switching hands. If you started temporally, simply approaching it nasally may work much more easily.
- Inject triamcinolone to visualize the hyaloid better. You will often see exactly which areas need to be aspirated and in which direction. And this may not necessarily be over the disc
PVD induction using a lighted pick
Video by Emmanuel Chang, MD PhD and Mrinali Gupta, MD
- Use a pic to elevate the hyaloid.
- Use a soft tip cannula since it occludes very well.
PVD induction using the soft tip
Video by Emmanuel Chang, MD PhD and Mrinali Gupta, MD
- Use forceps to induce the PVD.
PVD induction using a forcep
Video by Emmanuel Chang, MD PhD and Mrinali Gupta, MD
- Place the cutter facing down towards the disc, and aspirate the peripapillary area all around to try to pop off segments of the Weiss ring, and then try to elevate it off the disc
- If the hyaloid is very taut, such as in diabetic cases, you can treat it as a membrane peel and start peeling the hyaloid off the macula with forceps or an MVR blade, and then extend it towards the disc.
PVD induction using a flexloop/tano scraper
Video by Emmanuel Chang, MD PhD and Mrinali Gupta, MD
- To avoid iatrogenic breaks, be cognizant of areas of lattice and/or posterior vitreous insertions, and ensure broad lightening in order to monitor the retina for undue traction during PVD induction.
Retinal Detachment Basics
Peripheral Shaving
One of the keys to successful retinal detachment surgery is to remove the vitreous completely, especially in areas of pathology. With currently wide-angle viewing systems, a remarkable amount of gel can be removed without scleral depression, especially over attached retina. However, the best shaves are accomplished with a skilled assistant who can scleral depress for you. Here are some pearls:
- Especially early on, it is safer to switch into a setting where cut rates are high and aspiration is low or controlled proportionally and/or a mode where the duty cycle is lower (duty cycle refers to the percentage of time that the port is open).
- Stay over the area of scleral depression, as the detached retina will be stabilized on the depressor.
- Use the light pipe well, to visualize the anterior vitreous
- Don’t forget about the posterior vitreous. Many eyes with retinal detachment have posterior insertions of the vitreous base that need to be shaved down.
- Debulk the gel over lattice as much as possible. This gel will never completely come off, unless the lattice is amputated.
- If the detachment is large and the retina is highly mobile, consider placing a moderate PFO bubble (only as far as the PPV has adequately been done) to stabilize the posterior retina. The residual vitreous can be methodically removed with depression and shaving from the PFO bubble edge to the anterior vitreous by repeating this maneuver across 360 degrees.
- Every surgeon has a different preference for the direction of the mouth of the cutter when shaving. Some prefer the closest shave possible and face the retina. Some like to keep it facing away from the retina, but place the cutter much closer, almost on top of, the retina. Some like to keep the cutter facing tangentially as a compromise between the two.
Shaving the vitreous
Video by Ross Lakhanpal, MD
Vitreous shaving with PFO assist
Video by Luis Haddock, MD
Vitreous shaving with PFO assist
Video by Mrinali Gupta, MD
How to Flatten the Retina
In retinal detachment surgery, once the traction is released by removing the vitreous, the retina should be able to reattach. The retina can be flattened by exchanging fluid for air or by injecting a heavy liquid such as PFO. Air comes in anteriorly from the infusion and makes its way posteriorly (pushing the subretinal fluid posteriorly), while PFO is injected posteriorly and moves anteriorly (pushing the subretinal fluid anteriorly).

Air coming down to flatten retina
PFO coming up to flatten retina
Since PFO is expensive, and droplets may be sometimes left behind, most surgeons prefer to flatten the retina with air. But if fluid is simply removed from the center of the eye, as the air reaches the retinal break, it will seal the break, and there will be posterior fluid remaining. Therefore the fluid needs to be actively drained from the break or from a posterior retinotomy.
During fluir-air-exchange, attention should be taken to keep the canula at the air-fluid interface by following the interface posteriorly. Failure to do so results in aspiration of air which is ineffective and creates turbulence (which can result in PFO bubbles).
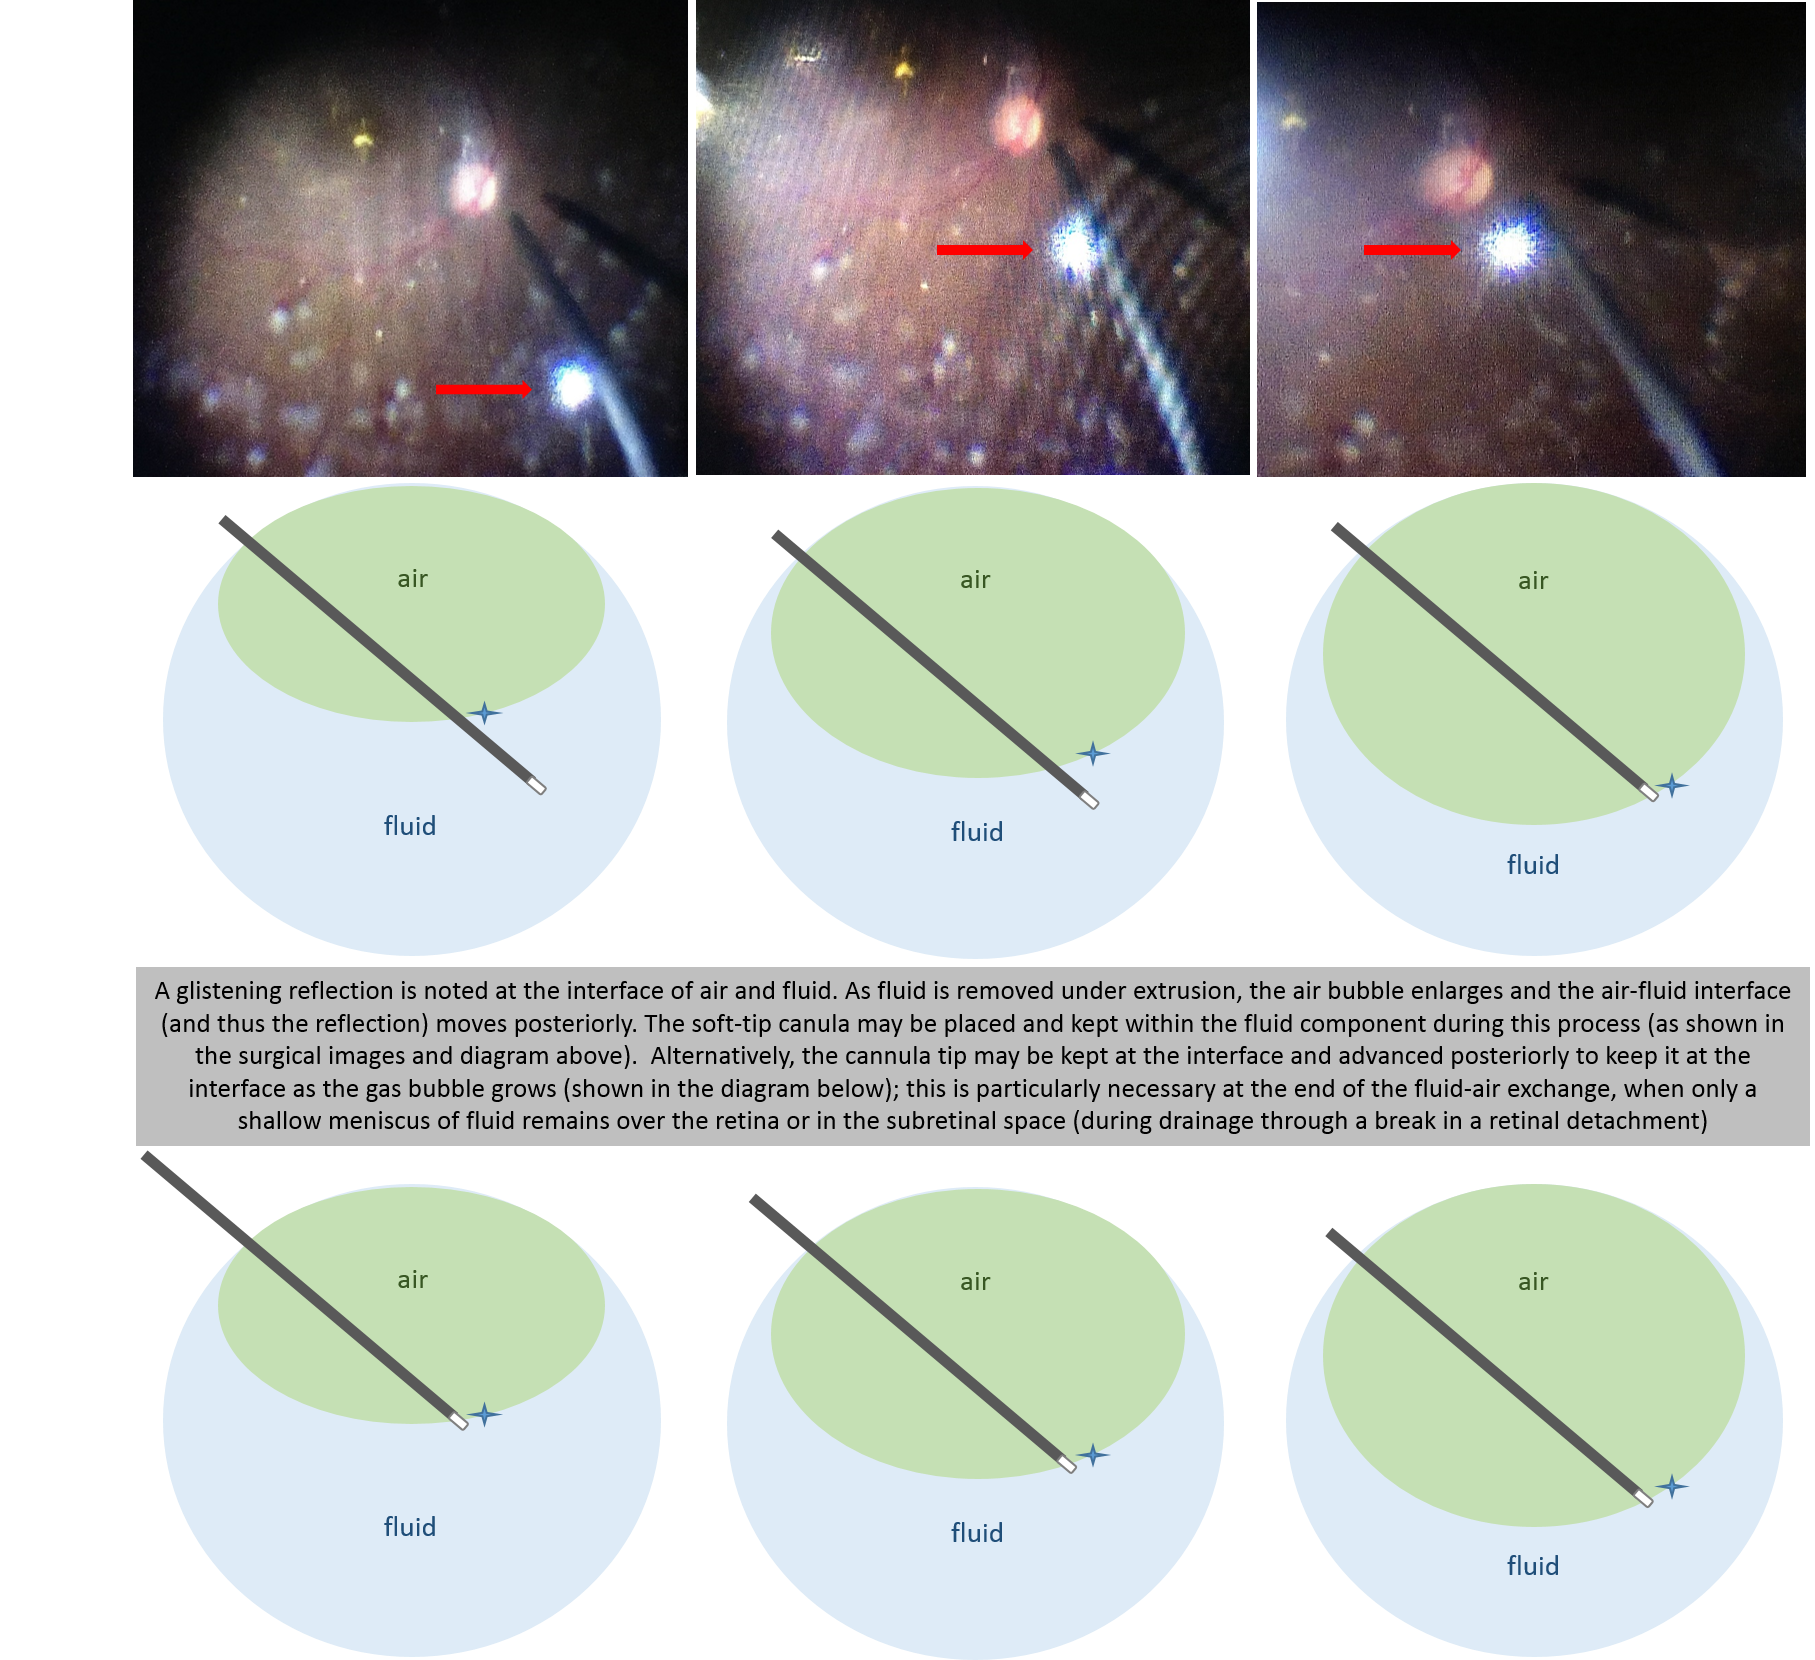
Canula at fluid-air interface
To drain from the break, the eye needs to be turned in the direction of the break (i.e. rotate the globe so that the break is as “posteriorly” oriented as possible), so that the fluid tracks down to where you are aspirating the fluid. You need to work the posterior edge of the break to try to get as much subretinal fluid as possible. Mild residual subretinal fluid posterior to the break is fine, as long as sufficient drainage has been done to enable laser, because the break is still going to be sealed, and the fluid should resorb on its own quickly. However, excessive residual fluid can predispose to retinal folds, especially in superior detachments or with poor post-operative positioning.
Draining subretinal fluid from the break under air
Video by Yoshihiro Yonekawa, MD
To create a posterior retinotomy, diathermy is used to cauterize a focal area of the retina, which is then opened with a soft tip cannula. Fellows may struggle initially with draining from posterior retinotomies because the retina is easily caught in the soft tip cannula. It is therefore important to stay in the center of the retinotomy. Patiently draining the fluid with medium vacuum (rather than high vacuum) can also reduce inadvertently capturing retina in the cannula.
Creating and draining from a posterior retinotomy
Video by Yoshihiro Yonekawa, MD
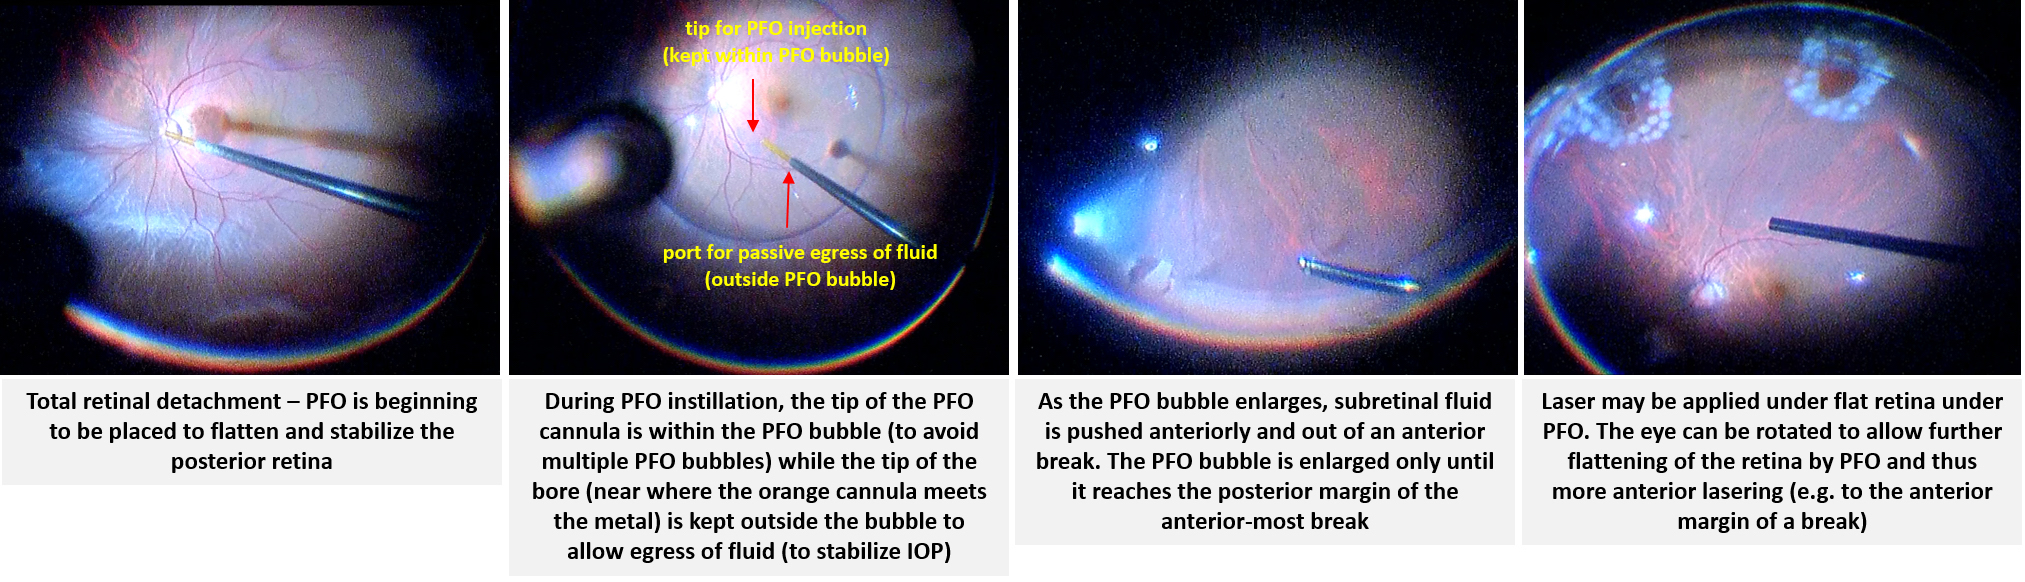
If using PFO, it is injected initially at the disc using a soft tip cannula. A dual-bore cannula is helpful, which enables injection of PFO from the tip, while allowing egress of BSS from another opening. This prevents over-pressurization of the eye during PFO injection. The tip of the cannula should stay in the PFO bubble to avoid separate small PFO bubbles), while the egress port should remain outside of the PFO bubble (to allow BSS, rather than PFO egress). Another technique is to use a smaller gauge soft tip (such as using a 25-gauge soft tip through 23-gauge cannulas). Otherwise, the eye will need to be periodically vented.
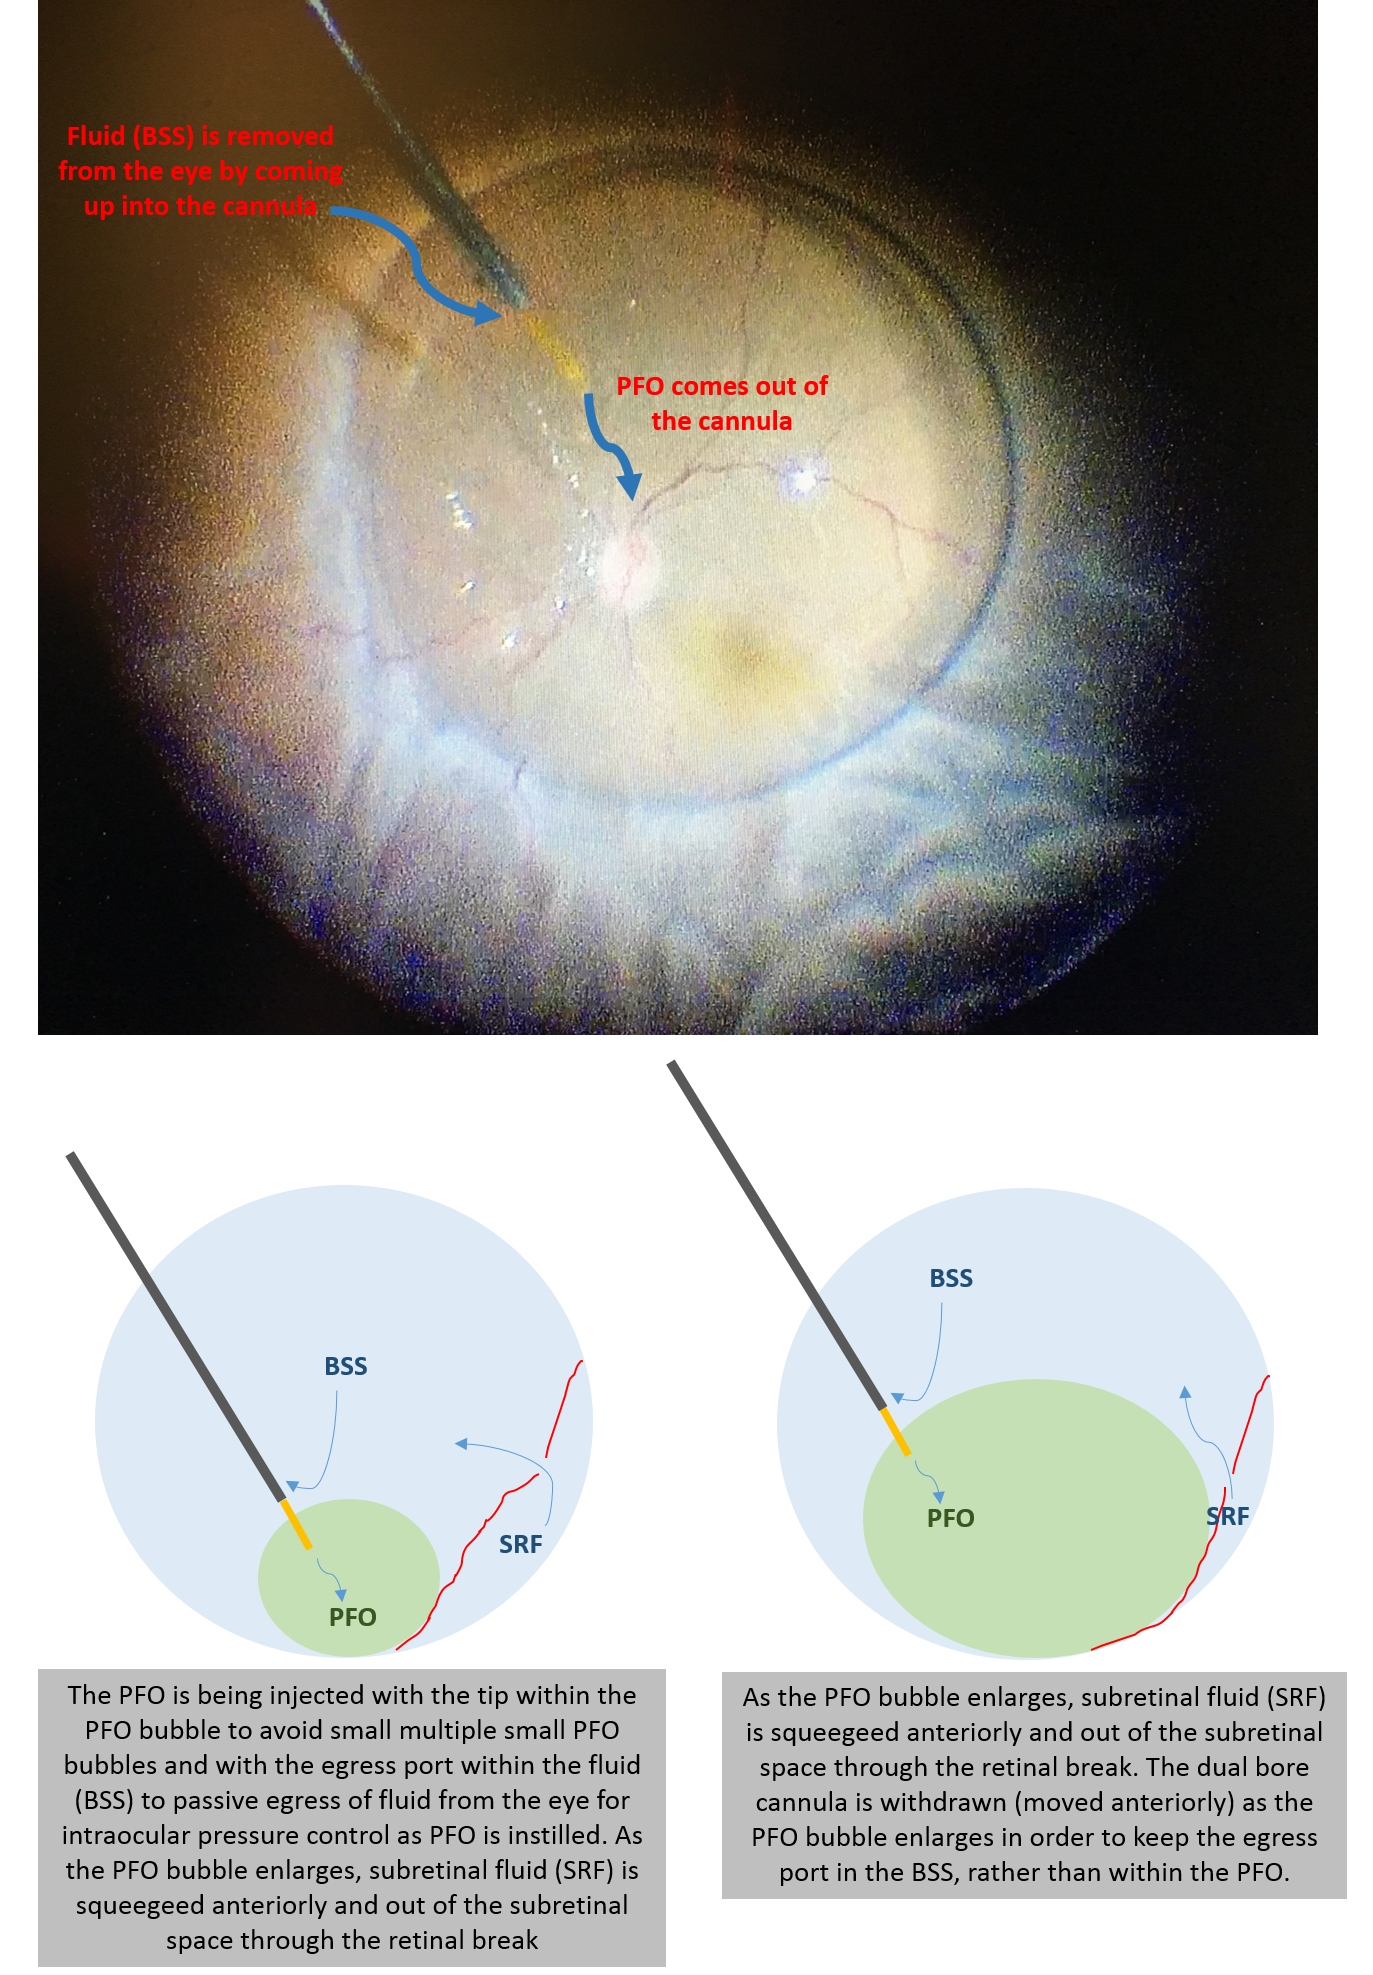
Dual bore PFO cannula
Since you want the subretinal fluid to be squeegeed out of the peripheral break, it is best to tilt the eye away from the break after the initial PFO bubble is formed. If you tilt the eye towards the break, there will be anterior fluid that gets trapped on the other side. PFO can be injected until it reaches the level of the most anterior retinal break.
PFO: injecting as a single bubble and draining of subretinal fluid
Video by Mrinali Gupta, MD
Once the retina is flat under PFO, the breaks can now be lasered. If part of the break is not covered by PFO, fluid will remain. This area can be flattened by rolling the PFO bubble to flatten the retina there, or it may be lasered later under air. Next, the PFO exchanged for air (you can’t go back to fluid because the retina will detach; therefore you go to air after PFO).
PFO removal is always a topic of discussion, because residual PFO can cause several issues, including inflammation, subfoveal PFO, and a marble of PFO on the retinal surface, all of which diminish the visual outcomes. Here are some pearls regarding PFO-air exchange:
- To avoid slippage (especially for giant retinal tears) and subretinal fluid migration that will open up the break, make sure you remove all of the fluid first that is overlying the PFO. Use the soft tip to see where the 2 interfaces are (air/fluid, and fluid/PFO).
- If there may be residual peripheral vitreous, especially in phakic eyes, you can start the anterior fluid removal with the vitreous cutter on.
- Turn the eye towards the break. In other words, when you put PFO in, you turn the eye away from the break. When you remove PFO, you turn the eye towards the break. This way the break will be supported by the PFO for as long as possible, and you will be sure to work the anterior fluid off to prevent subretinal fluid migration.
And to avoid residual PFO in the eye:
- Keep aspirating when coming out of the eye — don’t release the pedal because that will cause the PFO to dribble back out.
- You can dip the soft tip cannula into a bucket of saline and aspirate it, to clear the PFO out of the line.
- Considering placing a few drops of BSS onto the retinal surface to wash the PFO and aspirate it out more completely.
- While under air, vent the eye (through open sclerotomy or a vent). Since PFO is extremely volatile with a low boiling point, small amounts of PFO will evaporate through this maneuver. Though not the standard way to ensure PFO removal, this can be helpful for removing trace amounts of PFO after drainage in cases where visualization deteriorates and limits safe repeat drainage near the retinal surface.
- After getting the PFO out, move onto the next maneuver, whether it’s adding more laser or pulling up on the buckle. Afterwards, come back to aspirate more of the PFO that will almost always have reaccumulated posteriorly.
Endolaser
Laser is applied over attached retina, and works under fluid, PFO, or air. In retinal detachment cases, some surgeons prefer to retinopexy with cryotherapy at the start of the case; the rational being that the tear is treated, and you don’t have to worry about it if you lose the view at any point later. That being said, most surgeons prefer using endolaser for retinopexy, and certainly for PRP. There are several different types of laser probes:
Straight – This is the conventional laser probe. It is easy to insert into and direct within the eye and forces you not to cross over in a phakic eye.
Curved – Curved lasers allow you to cross over and treat the contralateral side, even in phakic eyes. Care must be taken that the laser is inserted through the cannulas in a way that follows its curvature, to avoid hitting the intraocular structures.
Lighted Lasers – This dual function is very useful for anterior lasering, especially if you are operating by yourself. You can depress with one hand, and laser with the other.
Curved laser crossing in phakic eye
Lasering with lighted laser (depress one hand, laser with other)
Video by Charles Wykoff, MD
There are various methods in applying laser:
Repeat mode, in rows – During a PRP, you can apply the laser spots in rows along the same meridian and thus same focus. As you move more anteriorly, the power needs to come down or the distance from the retina needs to be further, since peripheral retina will take easier.
Repeat mode, in chunks – A PRP can also be performed by applying laser within a certain area that requires the same laser parameters, before moving onto the next area.
Continuous mode – This mode is useful for lasering retinectomy edges or surrounding tears. It is easy to titrate, but in order to avoid hot burns, care must be taken to ensure that the laser probe is constantly moving.
Which Tamponade?
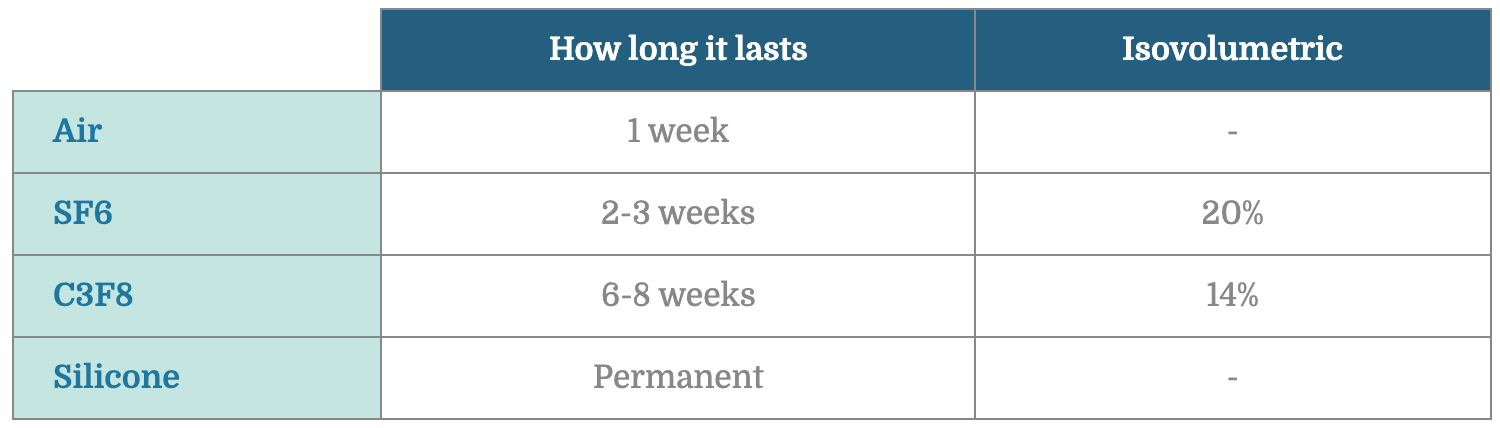
Tamponade selection will depend on the pathology and surgeon preference. In the U.S., we most commonly use air, SF6, C3F8, or silicone oil.
To fill the eye with gas, the eye is first filled with air (which is done at the time of retinal flattening or after removal of PFO), and a gas-air exchange is performed. Here are the steps:
- Pure gas is first obtained and diluted to the correct concentration using sterile filters.
- The infusion line, which should be set on air, is clamped with a hemostat or pinched by the assistant. This prevents the globe from losing pressure when the infusion line is disconnected.
- The infusion line is disconnected and attached to the gas syringe.
- Some gas is injected to pump up the eye in case there was loss of pressure.
- One of the cannulas are used as a vent as the gas is injected. If non-valved cannulas were used, one of the plugs are removed. Valved cannulas can be vented using a vent, forcep, or by using the vitrectomy probe with the aspiration line unscrewed and open to air (the longer length of the line results in more resistance and good maintenance of intraocular pressure during a slow air-gas exchange). 30-40 mL of gas is lavaged through.
- 30-40 mL of gas is lavaged through.
- The first two cannulas are removed, and once the wounds are secured, the infusion cannula can be removed. If the eye lost pressure at any point, a 30-G needle can be attached to the gas syringe and the residual gas can be used to fill the eye.
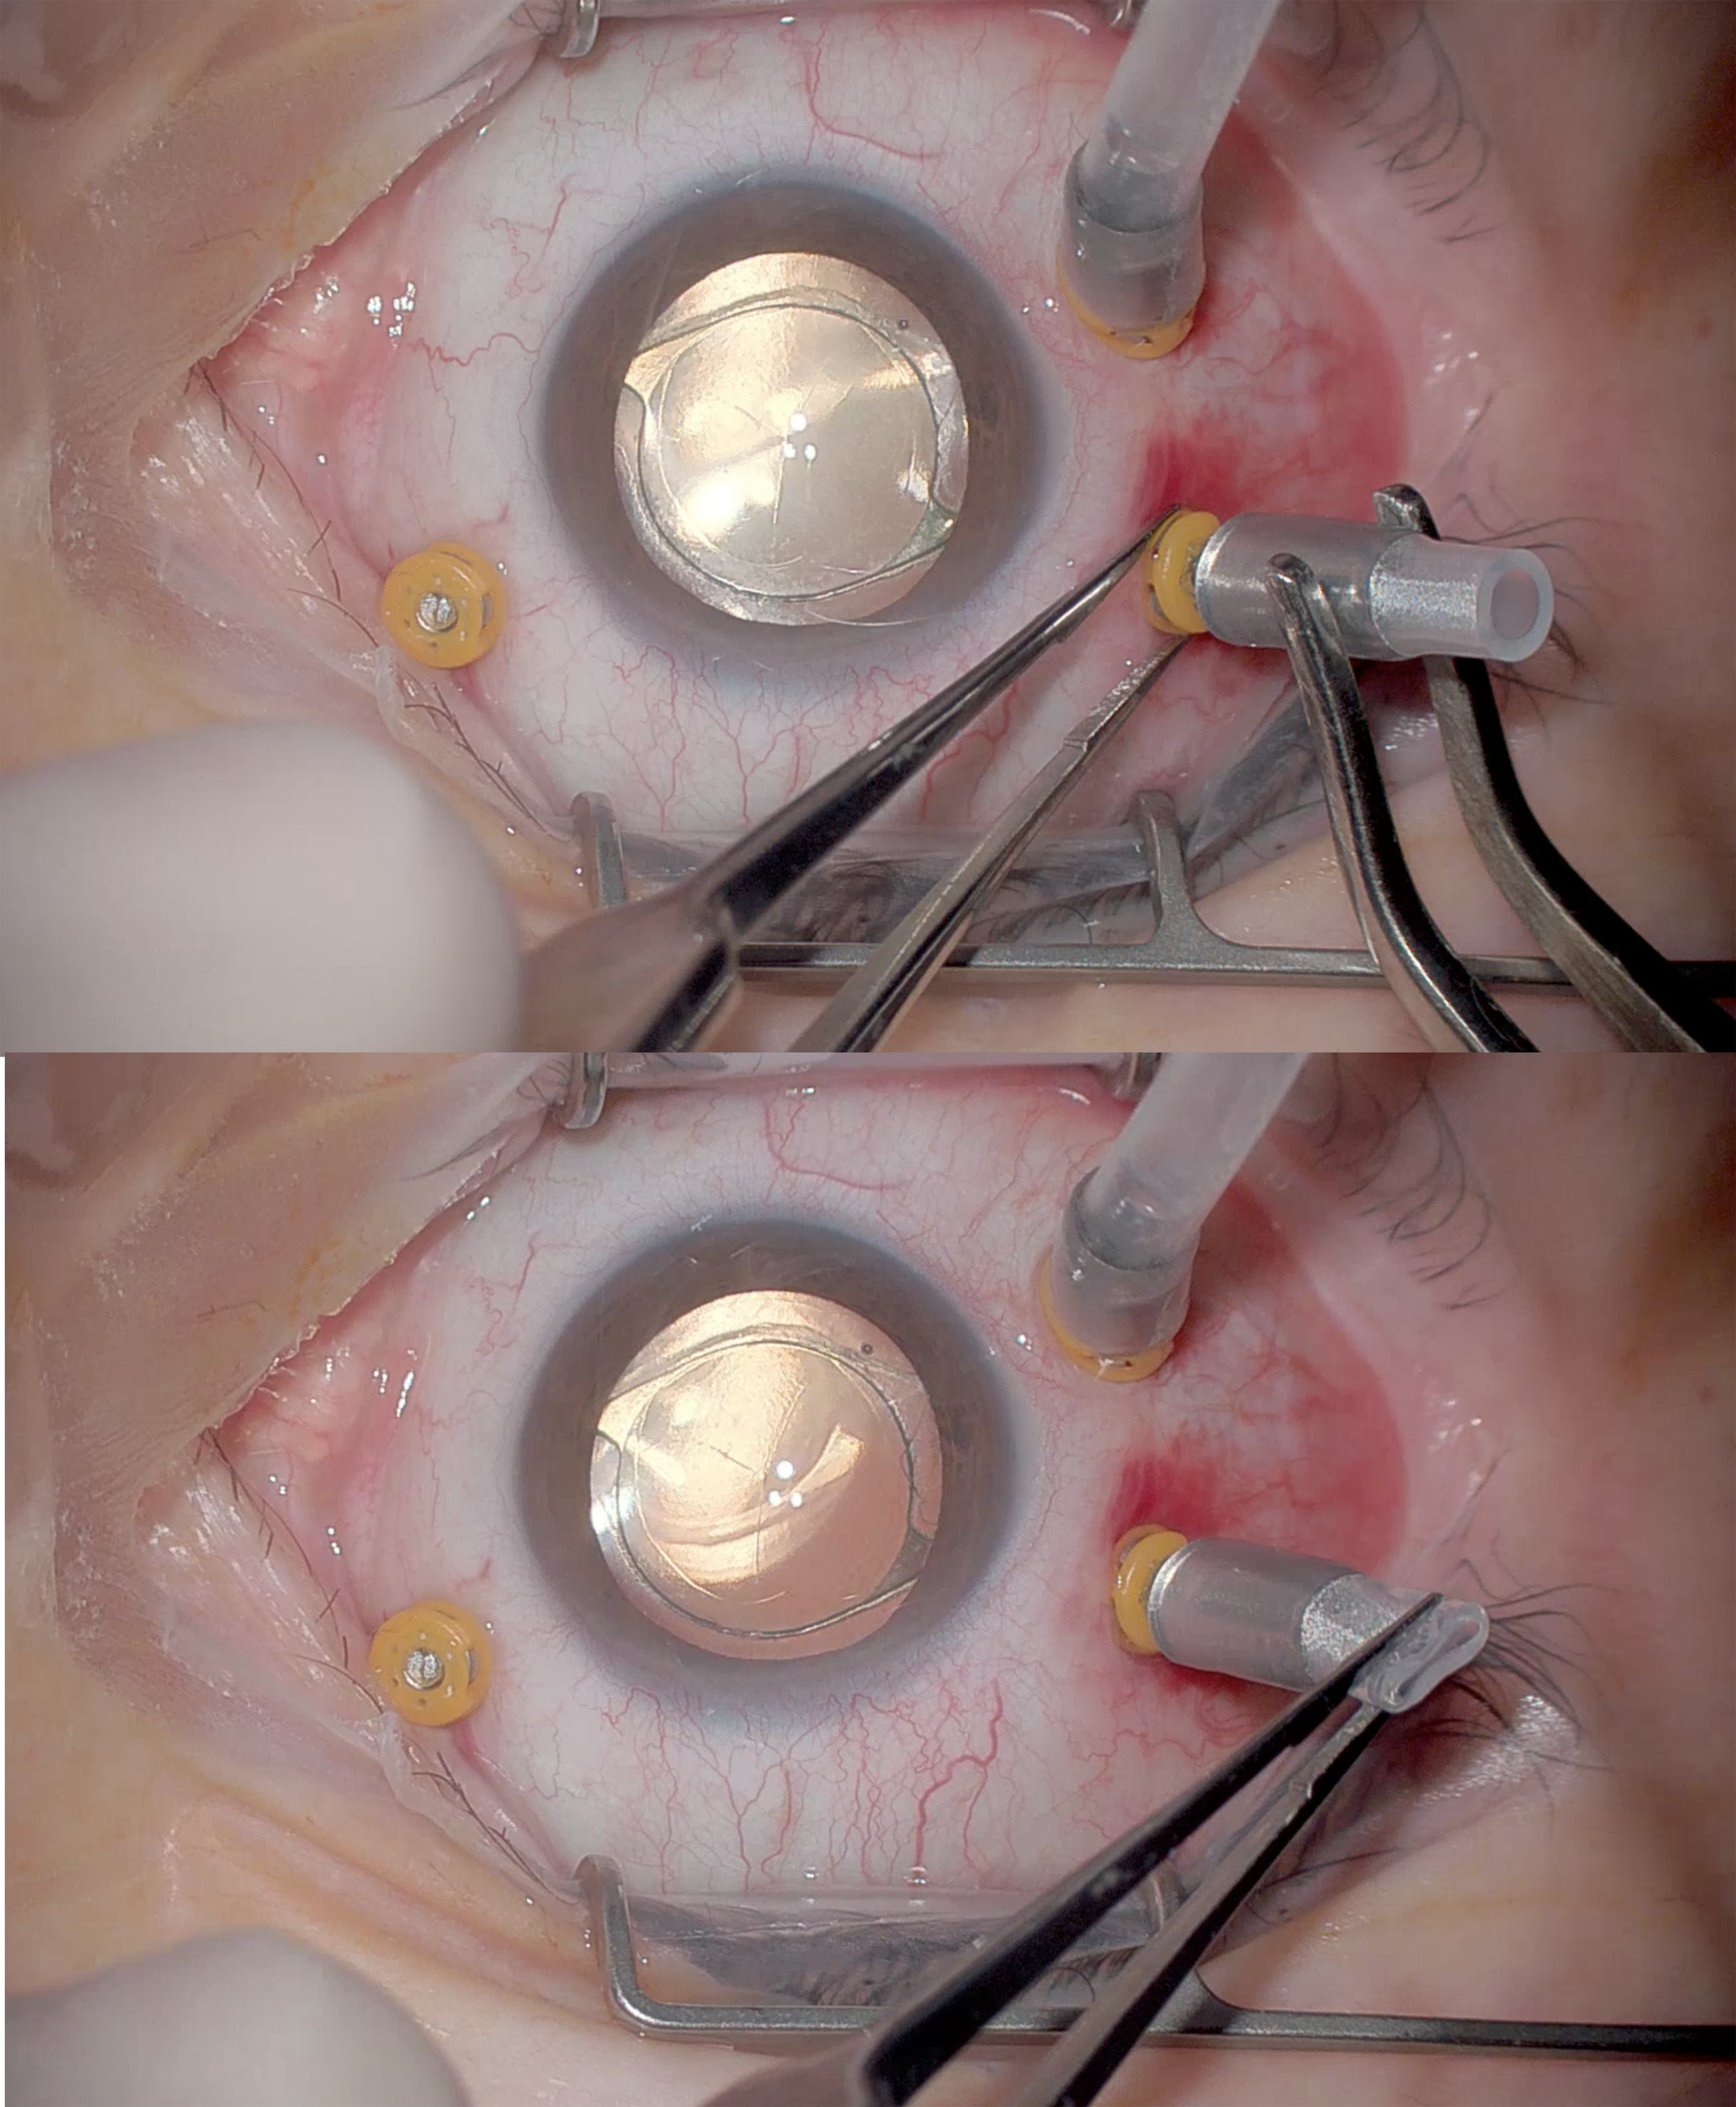
Venting with vent

Venting with forcep to open valve
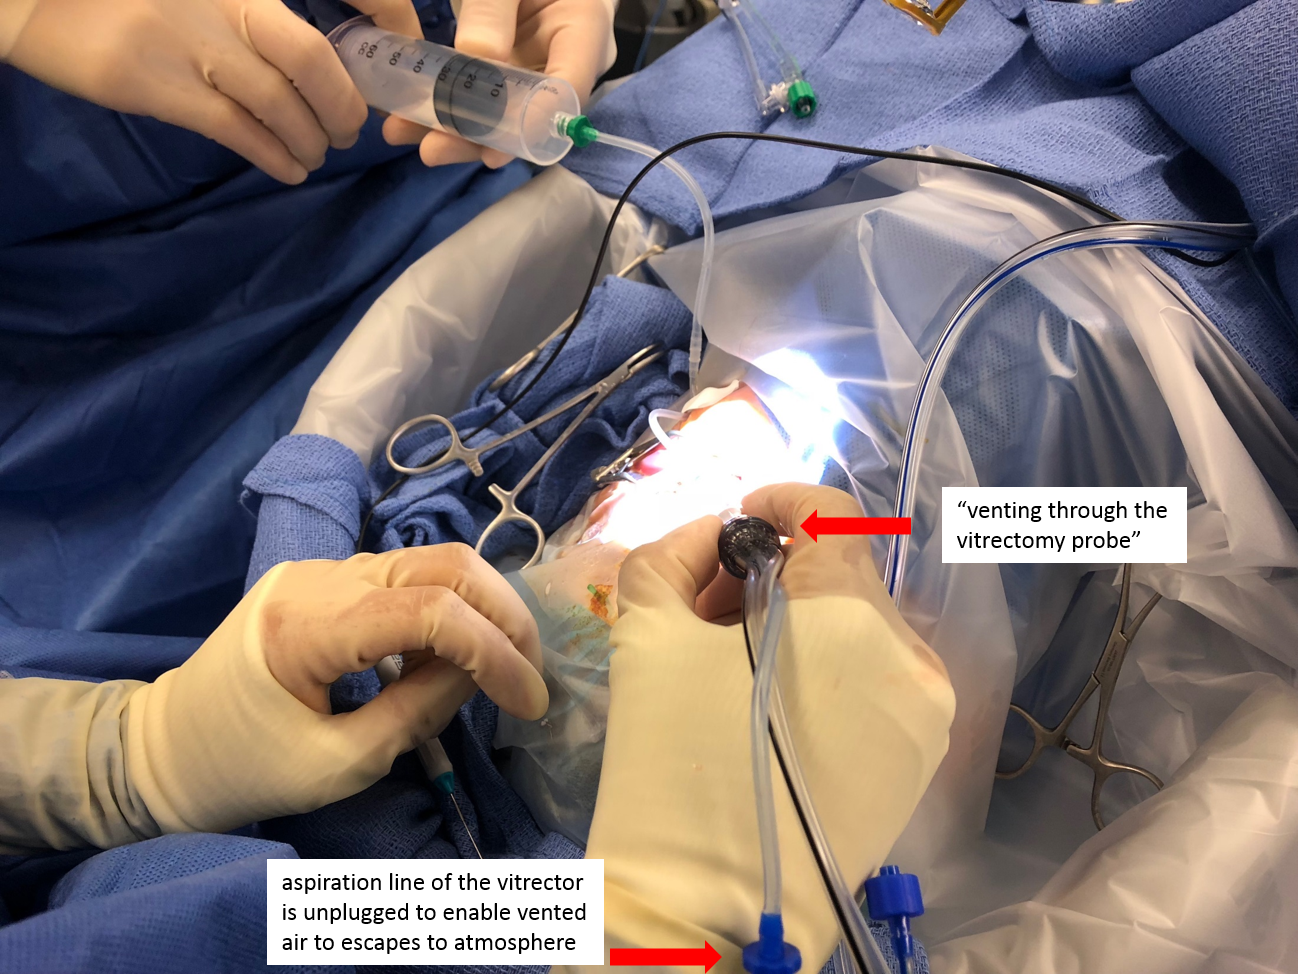
Venting using the vitrector
When and How to use Silicone Oil?
When a patient requires silicone oil, they are signing up for two surgeries, because the oil needs to be removed subsequently. In general, the oil is kept in place for 3-6 months. The longer the oil stays in the eye, the more likely that it will emulsify (break up into small pieces) and result in complications such as corneal decompensation and secondary glaucoma.
Properties of silicone oil:
Interfacial tension – Not as high as air or gas, therefore more likely to disperse. “Dispersion” is splitting of a bubble into smaller bubbles. “Emulsification” is when these bubbles cannot join back together.
Specific gravity (SG) – The SG of water is 1. If SG is great than 1, it will sink in water. If SG is less than 1, it will float in water. The SG of silicone oil is slightly less than water, so it floats up in the eye. The SG of oil is lower than that of air and gases, thus during air-oil exchange, the air vents anteriorly while the oil fills in a posterior to anterior fashion.
Buoyancy – Lower than air or gas, therefore less tamponading force.
Viscosity – We generally use two viscosities of silicone oil: 1000 or 5000 centistokes. 5000 centistokes theoretically has less likelihood of emulsification, but clinical experience has not definitively declared this to be true.
Heavy silicone oil – In Europe, heavy silicone oil is available (SG greater than 1), which sinks to be able to support inferior pathology better.
Indications for silicone oil:
- Eyes at high risk for PVR: trauma cases, combined tractional/rhegmatogenous detachments, pediatric rhegmatogenous retinal detachment, chronic or recurrent rhegmatogenous retinal detachment with PVR
- Monocular patients: you cannot see through gas, but you can see better through oil
- Those who cannot position: children, patients with neuromuscular difficulties
- Those who must travel by air: silicone oil does not expand at high altitude
- Some prefer it for retinal detachment caused by viral retinitis, which has high rates of redetachment
Appropriate silicone oil fill:
- Never overfill an eye with silicone oil. Intraocular pressure can sky rocket, and overfilled eyes usually require a trip back to the OR to extract the oil.
- When injecting the oil, lower the infusion pressure and place a vent in the unused cannula.
- You can also disconnect the infusion line for the pressure to equalize faster once you see the oil go up the infusion line. If you need more oil, reconnecting the infusion line can push the oil back in or an empty 3cc syringe can be attached to the infusion line canula to push some more oil back in. Move the globe to make sure you can see a meniscus of air that moves around.
- Make sure to suture all wounds. Subconjunctival silicone oil can cause chronic ocular irritation and is very difficult to surgically remove once it becomes incorporated into the tissues.
- One of the reflexive things one must remember in vitreoretinal surgery: aphakia + silicone oil = make an inferior PI to prevent pupillary block. Some surgeons also create an inferior PI when placing long-acting gas in an aphakic eye.
Injection of Silicone Oil
Video by Dean Eliott, MD and Patrick Oellers, MD
Creating an inferior peripheral iridotomy
Video by Maria Ana Martinez-Castellanos, MD
Macular Surgery Basics
ERM and ILM Peeling
Creating the initial flap is often the most difficult step.
Pinch and peel – The preferred technique for most surgeons, where forceps are used to pinch the ERM or ILM and to move it along the retinal surface.
MVR blade – An MVR blade can be used on the retinal surface to initiate flaps. If done correctly, it’s a very atraumatic method. The tip of the MVR blade can be bent also.
Tano scraper – Some surgeons prefer the diamond dusted Tano scraper to initiate peels. Long and slow sweeps are recommended rather than short flicks.
Flex loop – Retractable loops with serrated bottoms have been recently developed, which is useful for the beginning retina surgeon as it is a relatively forgiving instrument in terms of going too deep. Keep an eye on what’s going on underneath the instrument though, because you still do not want to exert too much pressure on the retinal surface.
ERM peeling: pinch and peel
Video by Mrinali Gupta, MD
ERM peeling: using the MVR blade
Video by Yoshihiro Yonekawa, MD
ERM peeling: using the tano
Video by Dean Eliott, MD and Patrick Oellers, MD
ERM peeling: using a flex loop
Video by Yoshihiro Yonekawa, MD
Instillation of dyes/stains using the cutter & double peeling ILM & ERM en bloc
Video by Mrinali Gupta, MD
Where to Initiate the Peel
- Some recommend the nasal macula, because the maculopapillary bundle is the thickest.
- Some recommend the temporal macula, to avoid the maculopapillary bundle.
- Some recommend wherever it’s easiest to access.
- Some recommend where there is best staining.
What Direction to Peel
- Some recommend a rhexis.
- Some recommend a single sheet that comes across the macula.
- Some recommend constantly peeling towards the fovea to avoid its distortion.
Peel ILM?
- Many surgeons peel ILM for every macular case.
- Most necessary: for macular holes without foveal attachment of vitreous, and any recurrent macular holes.
- Least necessary: pure cases of vitreomacular traction.
- Controversial: for ERM. Peeling ILM may decrease the recurrence rate, but the visual benefits have not been proven.
Dyes/Adjuncts
The following are the most commonly used visualization aids used during vitrectomy:
Indocyanine Green (ICG) – Most commonly used in the United States. Can be diluted in BSS or dextrose 5%.
Brilliant Blue (BB) – Most commonly used in the rest of the world, due to safest side effect profile (ICG can cause retinal toxicity if not careful, but BB is difficult to obtain in the US).
Trypan Blue – Widely available but difficult to get good staining.
Triamcinolone – Used to visualize vitreous better. Useful with difficult PVD induction, ERM peeling, and visualizing residual peripheral gel. Some surgeons use triamcinolone routinely for every vitrectomy.
Other Basic Surgical Techniques
Phaco-vitrectomy and pars plana lensectomy using the fragmatome
- In cases where the lens must be removed, options include staged procedure (phacoemulsification with intraocular lens implantation followed by pars plana vitrectomy at a later date), combined phacolensectomy and vitrectomy in a single procedure, or pars plana vitrectomy.
Phaco-PPV Combined Case
Video by José Gerardo García Aguirre, MD
- For pars plana vitrectomy and lensectomy, if the lens is soft enough (e.g. traumatic cataract combined with posterior segment pathology in a young patient), it may be easily removed using the vitrector. If there is denser nuclear sclerosis cataract, the fragmatome may be used for lensectomy.
- The fragmatome is essentially a straight phaco probe (without the torsional component) that uses ultrasound to emulsify and aspirate the lenticular material
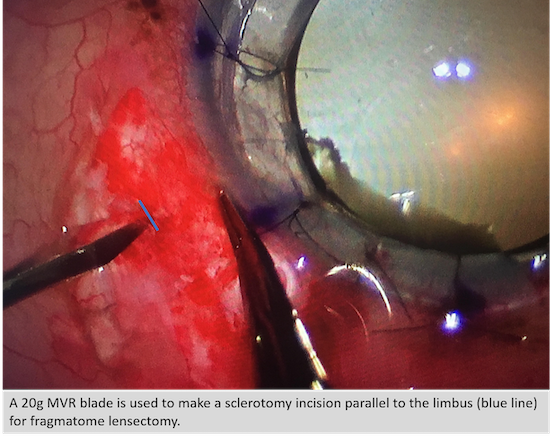
- Since it’s only available in 19G, either a new sclerotomy needs to be created or one of the existing sclerotomies need to be extended with an MVR blade or trocar. The wound needs to be sutured.
- For retained lens fragments after cataract surgery, some surgeons will start with smaller gauge vitrectomy and use the cutter to remove the lens fragments, and then use the fragmatome as needed.
- To be careful:
(1) The eye can easily collapse if you only aspirate BSS into the large mouth of the fragmatome – the smaller gauge infusion does not keep up. Make sure to occlude the tip first.
(2) Make sure a vitrectomy is performed prior to using the frag. Free all lens pieces from vitreous attachments. Lens sticks firmly to vitreous, and you do not want to pull on vitreous with the frag.
(3) For a primary lensectomy, make sure you can see the tip well before stepping on the pedal. You don’t want to frag the peripheral retina.
(4) Be careful when the tip “lolly pops” and goes through and through the lens. Make sure you don’t hit any intraocular structures on the other side. For free fragments, it’s best to stay towards the outside of the lens material so that it “tumbles” into the frag in a continuous motion, rather than lolly popping and having to remove the lens fragment off with the light pipe each time. Pulsing the fragmatome rather than continuously running it can also help the piece move around at the phaco tip rather than lollipop through in a single direction. Use the light pipe carefully as a second instrument to keep the lens fragment engaged on the frag.
Using the fragmatome for retained lens fragments
Video by Carl Regillo, MD and Katherine Talcott, MD